Pages

Sunday, September 15, 2013

Restaurant Favorites at Home - Part 1 (Indian)

I love Indian food...and Italian food...and Thai food...and Mexican food...okay, let's be real... I happen to love FOOD in general, regardless of it's ethnic background. I, like most people, go out for all of these types of foods because its more convenient than making the same items at home. The downside is that is not healthy to eat out all the time. So to promote clean eating, I endeavored to make some of my favorite restaurant favorites at home but without as many of the unhealthy components. By making these dishes at home I can control the ingredients I use as well as the amount of salt, oil, and fat that are typically called for. Also, I can have them whenever I want! I hope you enjoy the first in a four part series geared towards revamping restaurant favorites in a fresh and healthy way.


Chicken Tikka
recipe by Sweet'N'Spicy food app for iPhone and Android (my changes in italics)  

Ingredients:
2 lbs. Boneless Chicken (I used one package of chicken tenders)
1 cup Yogurt (I used Greek Yogurt )
1 tbsp. Ginger/garlic paste (I used freshly grated ginger and garlic)
1 tbsp. Lemon Juice
2 tsp. Red Chili Powder
1 tsp. Cumin Powder
1 tsp. Pepper Powder
Cilantro, chopped fine for garnish
Salt as needed

Directions:


1. Mix all of the spices, ginger/garlic paste freshly grated ginger and garlic and salt. Add to the yogurt and lemon juice (At this point you can refrigerate or even freeze the marinade for later use. All you would have to do is defrost it, if frozen, and add the chicken).

2. Prick the chicken and marinate in the yogurt mixtures for three hours  (I didn't prick the chicken and I was only able to marinade it for 2 hours).

3. Thread the chicken pieces onto skewers, brush with oil and grill or BBQ (I used my cast iron grill pan and grilled the chicken on the stovetop).

4. Garnish with cilantro and serve warm. 


Egg Curry
recipe by my mom


Ingredients:
2 tbsp. Olive Oil
2 Bay leaves
1 tsp. Cumin Seeds
Two large Onions, chopped
2 Green chili peppers, finely diced
4 small cloves Garlic, finely diced
1 tbsp. Ginger, grated
2 tsp. Red Chili Powder
1/2 tbsp. Garam Masala (adjust for your taste)
2 tsp. Ground Cumin
1/2 tbsp. Ground Coriander
3 to 4 Roma tomatoes, diced
1 cup water
9 eggs, boiled and chopped (I used an egg slicer twice on each egg to get a smaller cut.)
1/4 cup Red Onion, chopped
1/4 cup Cilantro, chopped
Salt as needed

Directions:


1. Heat oil over medium-high heat in a deep pot until hot, then add the cumin and bay leaves.  Cook until the seeds sizzle and brown. 


2. Add the onions, garlic, ginger, and green chili peppers. Cook until the onion is translucent.


3. Add the red chili powder, garam masala, ground cumin, ground coriander and salt. Cook for a few minutes and then add the tomatoes and water. Turn heat to low, cover, and let simmer for approximately 15 to 20 minutes (at this point, you can let the curry cool and then freeze it for later use. All you would need to do then would be to boil eggs and then warm up the defrosted curry). 


4. Add the chopped eggs to the curry and gently fold the eggs into the curry.


5. Top with red onion and cilantro. 

6. Serve warm with naan and rice (I used naan and quinoa)

Wednesday, August 14, 2013

Comfort Foods Menu

Hello....it's me...remember me? I know, it's been an incredibly long time since I posted anything new. The hiatus wasn't because I haven't tried new recipes...it's just this year has been brutal. We had a few happy events and then a few not so happy ones followed by more happy events which were then followed by the not so happy. To sum it up, this year has been an emotional roller coaster full of amazing highs and rock bottom lows. It's because of the insane events that have been going on all year long that I had not even thought about posting anything. 

A few weeks ago, though, I finally accepted that things are just gonna keep on happening and that I can't let those things get me down. Instead, I just have to go with the flow and roll with the punches. And boy have there been a lot of punches so far! At any rate, for the past week and a half (I know it's not that long, but baby steps y'all!) I have been throwing myself into yoga and working out to get my mind and body ready to go with the flow and roll with the punches. Needless to say, I look forward to that hour when my mind is concentrating on how the heck that one lady is able to fold herself into a pretzel without falling over instead of everything else that's been going on. Cooking is another therapeutic act for me and so while I  haven't been blogging, I have still been cooking and even got around to baking a few things.  

The following recipes are just a few of the things that I made over the past few months. They allowed me to cope with the curveballs and continue putting one foot in front of the other and moving forward. And it helped that the majority of the following recipes took 30 minutes or less to prepare so they are great for after long work day. 


Greek Salad with Lemon Vinaigrette 
recipe by Salt as Needed


Greek Salad Ingredients:
Large head of Romaine Lettuce, chopped
1 pint cherry tomatoes, cut in half
1 half of a cucumber, cut in half and sliced
1/2 cup of yellow bell pepper, chopped
1/4 cup of green olives, pitted
1/4 cup of black olives, pitted
1/4 cup of feta cheese
1/4 of a small red onion, thinly sliced
Lemon Vinaigrette (recipe follows)

Directions: 
1. Place all ingredients in a large bowl and stir to combine. 
2. Toss with desired dressing.

Lemon Vinaigrette Ingredients:
1 tablespoon apple cider vinegar
Zest from 1 lemon
Juice from 1 lemon
1 teaspoon. Dijon Mustard
1/2 teaspoon freshly ground peppert
6 tablespoons Olive Oil
Salt as needed

Directions: 
1. Whisk mustard, lemon zest, and juice in a small bowl.
2. Season with salt and pepper. 
3. Slowly drizzle in olive oil while whisking the other ingredients until all the oil is incorporated and mixture is thickened and uniform in color. 


Southwestern Chopped Salad with Cilantro Lime Dressing 
recipe by The Garden Grazer (my changes in italics)


Southwestern Chopped Salad Ingredients:
Large head of romaine
15 oz. can black beans, rinsed and drained 
1 large orange bell pepper (I used half a red bell pepper and half an orange bell pepper)
1 pint cherry tomatoes (I used one roma tomato)
2 cups corn (I used one 15 oz. can of sweet corn, rinsed)
5 green onions
Creamy Cilantro-Lime Dressing (recipe follows)

Directions: 
1. Finely chop romaine, bell pepper, tomatoes, and green onions.
2. Place all ingredients in a large bowl and stir to combine. (I just arranged the ingredients on a platter)
3. Toss with desired dressing.


Creamy Cilantro-Lime Dressing Ingredients:
1 cup loosely packed cilantro, stems removed and roughly chopped
1/2 cup plain Greek yogurt
2 Tbsp. fresh lime juice (about 1/2 lime)
1-2 garlic cloves
1/4 cup olive oil
1 1/2 tsp. white wine vinegar (I used apple cider vinager because that's what I had in my pantry)
1/8 tsp. salt as needed

Directions:
1. Puree all ingredients in a blender or food processor until smooth.
2. Taste and adjust seasonings if necessary.


Meaty Lasaga 
recipe by Salt as Needed


Ingredients:
1 tablespoon olive oil
1 pound lean ground beef (you can use lean ground turkey as a substitute)
1 jar spaghetti sauce
1 pint part-skim ricotta cheese
1/4 cup grated parmesan cheese
1/4 cup grated pecorino romano cheese
8 oz shredded mozzarella cheese
2 eggs, beaten
1 package lasagna noodles (I used Barilla Oven Ready Lasagna noodles)

Directions: 
1. Preheat oven to 350 degrees
2. Heat the oil in a large skillet. Add the ground beef once the oil has warmed up and stir until browned. 
3. In a medium bowl, combine the ricotta cheese, eggs, parmesan cheese, and pecorino romano cheese, and mozzarella cheese. Set aside.
4. In a pre-greased casserole dish, spread a tablespoon of the spaghetti sauce. Layer with lasagna noodles, 1/4 of the cheese mixture, 1/3 of the meat, and just enough spaghetti sauce to cover the meat. Repeat two more times, topping with another layer of lasagna, enough spaghetti sauce to cover the lasagna noodles and the last 1/4 cup of the cheese mixture.
5. Cover with tin foil and place in the center rack of the oven.
6. Bake for approximately 45 minutes.
7. Uncover and bake until the cheese is bubbly and golden brown.
8. Remove from oven and let rest for at least 15 minutes prior to slicing and serving. 


French Macarons with Vanilla Buttercream 
recipe by SprinkleBakes (my changes in italics)


Macaron Ingredients:
3/4 cup almond flour
1 cup confectioners' sugar 
2 large egg whites, room temperature
1 pinch cream of tartar
1/2 cup extra fine sugar (I used powdered sugar)
Sky blue gel food coloring by Wilton

Directions: 
1. Preheat oven to 375 degrees.  Line two baking sheets with parchment.
2. Sift almond flour and confectioners' sugar together 2-3 times. Set aside. (I only sifted it once)
3. Whisk egg whites with a hand mixer until foamy.  Add cream of tartar and beat until soft peaks form. 4. Reduce speed and gradually add extra fine sugar powdered sugar.  Increase speed and beat until stiff peaks form.
5. Sift flour mixture over whites with a fine sieve. Discard any lumps or coarse bits that remain. 
6. Fold mixture together with a rubber spatula using short strokes until just combined .  The batter will be very stiff. Place a small amount of Wilton Sky Blue gel food coloring on the end of a rubber spatula. 
7. Use bigger folds once batter loosens.  When batter is ready, it should fall from the spatula in a thick ribbon. 
8. Transfer mixture to a piping bag.  Pipe 1 or 1 1/2" rounds on the parchment lined baking sheets. Let piped macarons stand uncovered for 15 minutes to form a crust. 
9. Decrease temperature to 325 just before placing the baking sheet in the oven.  Bake pans one at a time for 10 minutes, turning halfway through.


Vanilla Buttercream Ingredients:
1 cup unsalted butter
3 1/2 cups confectioners' sugar
1 teaspoon Vanilla Extract
Pearl dragees (this is optional but they make the macarons look so cute!)

Directions:
1. Cream butter and confectioners' sugar together in a large bowl using a hand mixer or stand mixer.
2. Beat on high speed until light and fluffy.  If mixture is stiff, use 1 or 2 tablespoons of cream water to loosen.  
3. Add vanilla extract slowly and beat until thoroughly incorporated.  Transfer icing to a piping bag and pipe on half the macaron shells. Sandwich with remaining shells.  
4. Using a new pair of tweezers press a line of pearl dragees into the buttercream. I just sprinkled them onto the edges because I didn't have "baking tweazers". 

Tuesday, March 12, 2013

Going Out to Eat

This year, my husband decided to punt planning Valentine's Day and our Anniversary to me. Unfortunately, he didn't tell me that this was his plan until mid January. That didn't give me much time make plans for either event. I quickly made reservations at a couple of nice restaurants for both Valentine's Day and our Anniversary. A few weeks later though, I got to thinking about how going out to dinner is no longer only saved for special occasions. When I was a kid, going out to dinner used to be an event that we saved only for "special events". These days, our generation has gotten used to going out to dinner when we don't think we have the time it takes to prepare a home-cooked meal after a long work day. It seems as if I had just fallen victim to just making dinner reservations without even thinking twice about the reason we were going out to dinner. 
So for Valentine's Day I called my husband and said "can we cancel our reservations and just stay in"? Lucky for me, he was on the same wavelength and we ended up having a stay-in date with a bottle of wine, some heart shaped pizza and some delicious cupcakes from Pure DeLite Bakery. I highly recommend this bakery as they have cut out the extra fat and calories but still managed to keep all the flavor. 

After ordering pizza for Valentine's Day I knew that I needed to put even more thought into our anniversary dinner. After a few days of very intense brainstorming, I came across Chef Sevilla's website. I contacted Chef Sevilla and we quickly came up with a menu for my anniversary dinner. Chef Sevilla went grocery shopping and came to our house and prepared a four course dinner with fresh ingredients that was out of this world tasty. She cooked everything and even cleaned up! Sometimes you want the benefit of a meal prepared by someone else but without the added hassle of making reservations, getting dressed up, driving out to a restaurant, waiting for your table, having to take the chance that you may not get good service or atmosphere. And for those times you will want to call Chef Sevilla and have her take care of all the variables that come with going out to dinner and be treated to a fantastic dinner in the comfort of your own home. 

Meal and Menu by Chef Sevilla of Sevilla's Savory Solutions


Sunday, January 13, 2013

Baked Mini Cake Doughnuts

Moving makes you realize how convenient it was having everything already organized and put away. Having to start from scratch results in opening multiple drawers and cabinets just to find a mixing spoon. Not a productive environment when you are trying to resume your regular cooking and baking regimen. On the plus side, it means you discover all sorts of fun stuff you forgot you had because you stuck it away in a cabinet or drawer and forgot about it.

One of the first housewarming gifts I received was a Wilton Mini Doughnut pan.  This mini doughnut pan will not be stuck away in a cabinet and forgotten. It is AWESOME! It's almost as awesome as my mini cupcake pan. Anyone that does not have a mini doughnut pan should go out today and get one. Having the capability to make doughnuts in the comfort of your own home is fantastic... you can control what sprinkles you want on them, how many, how few, whether you want to just coat them in cinnamon sugar, or you just want to consume the doughnuts plain and unadorned by toppings. This past weekend I got the mini doughnut pan out and went to work. While these baked mini doughnuts are not as sweet as your typical fried doughnut, the glaze and toppings work to make this treat just sweet enough that you won't go into a sugar coma if you consume the entire batch, which you shouldn't do, but if you do, at least they are baked and not fried!  Besides, mini-anything is always good! 

Baked Mini Cake Doughnuts
recipe courtesy of Wilton (my changes in italics)


Ingredients:
1 cup cake flour, sifted (I made my own cake flour with one cup less two tablespoons of all purpose flour plus two tablespoons of cornstarch, which I sifted...I was supposed to sift the cornstarch into the all purpose five times but I just did it once)*
1/3 cup granulated sugar (I used the Splenda for baking sugar blend)
1 teaspoon baking powder
1/4 teaspoon salt
1/8 teaspoon ground nutmeg
1/8 teaspoon ground cinnamon
1/3 cup buttermilk (I made my own buttermilk by mixing 1 cup of milk with 2 teaspoons of cream of tarter)*
1 egg, lightly beaten
1 tablespoon butter, melted

*I used the substitutions provided on the Joy the Baker blog for Cake Flour and Buttermilk. This site is awesome for finding appropriate substitute ingredients when you realize in the middle of baking that you are out of a necessary recipe ingredient. 

NOTE: Makes about 12 mini doughnuts.

Directions
:


Preheat oven to 425 degrees.

Spray Mini Doughnut Pan with vegetable pan spray (I used baking spray).

In a large bowl, sift together flour, sugar, baking powder, salt, cinnamon and nutmeg. 

Add buttermilk, egg and butter. Stir until just combined. 


Fill each doughnut cup approximately 1/2 full with 1 tablespoon of batter. Spread batter around center post to edges of cup. 


I put the batter into a piping bag, snipped off the tip and piped the batter directly into the cups. It was a lot faster and neater than trying to spoon batter into the doughnut cups.


Bake 6-7 minutes or until the top of the doughnuts spring back when touched. 


Cool in pan for three minutes.


Then remove to cooling grid. 


Finish doughnuts with glaze (Recipe follows below), sprinkles, or cinnamon sugar.


Vanilla Glaze 
recipe courtesy of Wilton (my changes in italics)
Ingredients:
1 cup confectioners' sugar
2 tablespoons milk (I kind of drizzled the milk in until I got the consistency I wanted, which was thick enough for the sprinkles to stick to but not so thick that it was overly sweet)
1/2 teaspoon Wilton's Pure Vanilla Extract (mine was not Wilton brand and the glaze tasted just fine)

Directions:
In a small bowl, stir together sugar, milk, and vanilla extract until sugar is completely dissolved. Use immediately to glaze doughnuts. 

Makes enough to glaze 36+ mini doughnuts.

Thursday, January 10, 2013

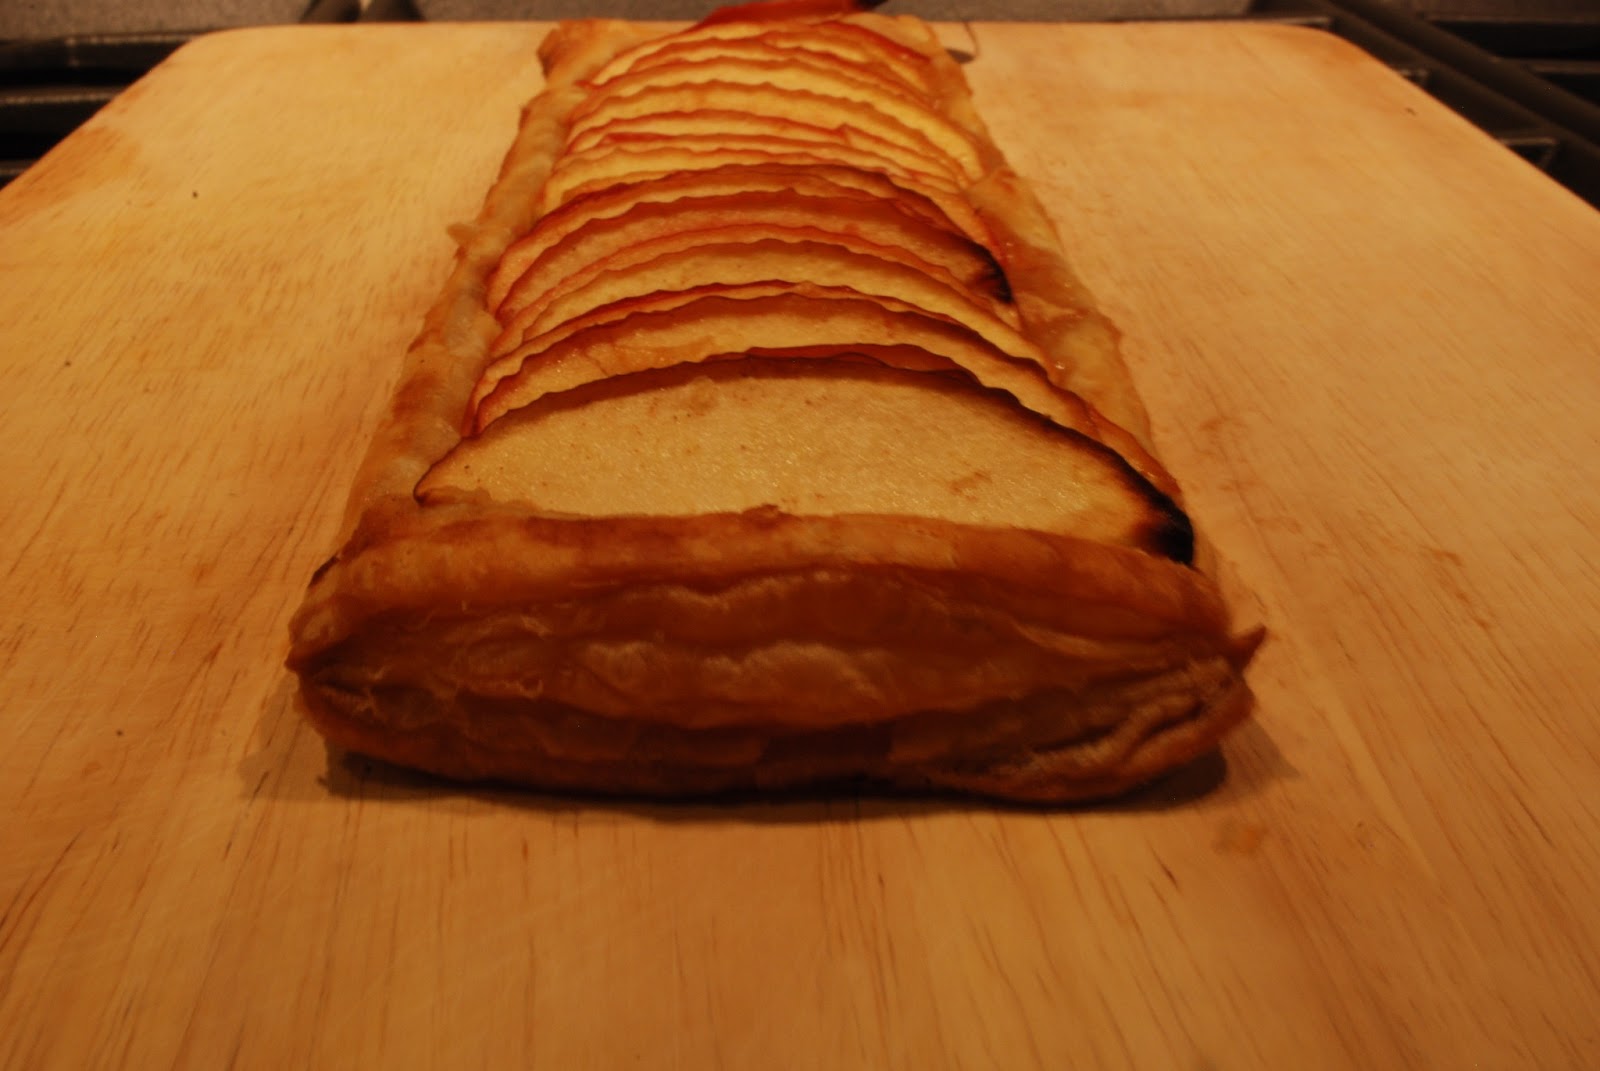
Quick and Easy Apple Tart

Well hello there! I can't believe that it's been over TWO MONTHS since my last blog post! Sorry for the long hiatus, it  has been a hectic and crazy past couple of months with traveling, holidays, packing, moving, and settling into a new place. Now that the holidays are behind me, I can finally get back into blogging as I need to start breaking my new kitchen in. This apple tart recipe was brought to my attention when a family member posted a picture of the tart her daughter made on Facebook. As soon as I saw the Facebook picture of this Apple Tart, I knew I had to have the recipe. This Apple Tart can be made in less than an hour without having to perfect a crust recipe (we will save that for another day). We devoured an entire third of this apple tart in one sitting. It's that good. Seriously...I'm thinking about the other two pieces of the tart that are left and I have a feeling that they may not make it to see another day. 


Quick and Easy Apple Tart
recipe courtesy of The Pioneer Woman (my changes in italics)

Ingredients:
1 whole Sheet Puffed Pastry, Cut Into Half Or Thirds (I cut it into thirds)
4 whole Apples, Cored, Halved, And Sliced, But Not Peeled (I used three Gala apples)
1 cup Brown Sugar (I used 1/2 a cup of Splenda Brown Sugar Baking Blend)
1/4 teaspoon Salt 
1/4 teaspoon Cinnamon
1 tablespoon Lemon Juice (I used bottled lemon juice)


Directions:
Preheat oven to 415 degrees.
Place puffed pastry rectangles onto a baking pan that’s been sprayed with nonstick spray. Add sugar and salt and lemon juice to apples. Stir to combine. Allow to sit for a few minutes.

Arrange apple slices on the pastry rectangles in a straight line, overlapping as you go. Bake for 18 to 20 minutes, or until pastry is puffed and golden brown.

Remove from pan immediately and place on a serving platter. Serve plain, with caramel topping, whipped cream, or a sprinkling of powdered sugar (I was too impatient for any toppings, so I just cut up a sizable piece and went to town).


Monday, October 15, 2012

The Best Yellow Cake

I have always been a fan of box yellow cake batter. I mean its so good that I would look forward to licking the mixing spoon, throwing caution into the wind and ignoring the fact that I was consuming raw eggs because I was too impatient to wait for the cake to finish baking. As I have been expanding my baking skills, I figured that there had to be a recipe for the good old standard box yellow cake. Lucky for me, I stumbled across Bakerella, a blog dedicated to all things sweet, that allowed me to dust off all of the supplies I bought during my cake decorating classes and attempt. While browsing through all of the awesome recipes and wonderful pictures, I came across Bakerella's post about this Yellow Cake recipe . I have made this recipe twice now, and both times I received excellent reviews from my culinary test subjects. The first time I made this cake I made it in two various sized cake pans and made a two tier UT themed birthday cake. The second time I halved the recipe and made cupcakes in honor of the UT/OU game. Lucky for us, the food and fellow UT fans at the watch party made up for the game itself. 


Looks like I need to keep working on my fondant skills, my cake is lopsided!

Moist Yellow Cake 
Recipe courtesy of Bakerella (my changes in italics)

Ingredients:
1 cup (2 sticks) of butter (room temperature)
2 cups of sugar
4 eggs (room temperature)
3 cups of sifted self-rising flour (I used 3 cups all-purpose flour with 4 1/2 tsp baking powder and 3/4 tsp salt)
1 cup of whole milk (room temperature) (I used 2% milk)
1 teaspoon pure vanilla extract
1/2 teaspoon butter flavoring (I omitted this)

Directions:
Yields one layered cake or approx. 18 cupcakes
Preheat oven to 350 degrees.
Grease and flour (3) 8 inch cake pans. (I used Baking Spray on one 8 inch cake pan and one 5 inch cake pan for the tier cake and two muffin tins for the cupcakes)
Using a mixer, cream butter until fluffy.
Add sugar and continue to cream for about 7 minutes.
Add eggs one at a time. Beat well after each egg is added.
Add flour and milk (alternating to creamed mixture), beginning and ending with flour.
Add vanilla and butter flavoring to mix; until just mixed.
Divide batter equally into three two cake pans (or fill two muffin tins lined with cupcake liners about 3/4 full).
Hold each layer pan or muffin tin about 3 inches above your counter and carefully drop them flat onto counter several times to ensure release of any air bubbles. This will help you have a more level cake.

Bake for 25 – 30 minutes (depending on your oven) until done.

Cool in pans for 5 – 10 minutes.
Remove and immediately wrap each layer in plastic wrap to seal in moisture (I didn't do this). 
Cool completely on wire racks.
Once cooled, you are ready to assemble your cake (or prepare frosting your cupcakes). 


Thursday, September 13, 2012

Mango Chai Spiced Cupcakes

Many Indians celebrate Raksha Bandhan each August to honor and cherish the bond between brothers and sisters. My sister and I rarely got to participate in this holiday as none of our cousin brothers lived near us. Before moving to Texas, the last time that I actually got to participate in tying a Rakhi on one of my cousins on an annual basis was when I was 7. After about 20 years, I can finally fully participate as the same cousin brother that I gave a Rakhi to when I was 7 lives in Texas and is a quick trip away. Typically, the sister prepares a thali (plate) with sweets, the Rakhi, white rice, and a red powder. Normally, the sweet is Peda, but as I have never made Peda before, I figured I would make a more modern sweet, like cupcakes. Determining the flavor of the cupcakes was easy as I had been wanting to make mango cupcakes and play with my basic buttercream recipe for a while. As I was surfing Pinterest, I came across this Mango Cupcake recipe and I knew that it would be perfect for celebrating Raksha Bandhan. The mango puree and filling makes the cakes moist while the Chai Masala gives them a subtle spice. I hope you enjoy them as much as my family and I did!

Fresh Mango Cupcakes
recipe curtesy of Dessarts.com (my changes in italics)


Ingredients:
1 ripe mango (should yield about 1 cup of puree)
1/2 cup coconut milk (I used vanilla soy milk)
3/4 cup soy milk (I used vanilla soy milk)
1 tsp apple cider vinegar
1 1/4 cup all purpose flour
2 tbsp corn starch
3/4 tsp baking powder
1/4 tsp baking soda
1/4 tsp salt
1/2 cup margarine, softened (I used Land O'Lakes Tub Butter with Olive Oil)
3/4 cup sugar (I used Splenda Sugar Blend)
2 tsp vanilla (I omitted this as the Soy Milk contained Vanilla)
4 tsp sugar (for filling)
1 tbsp corn starch+ 2 tbs cold water  (to thicken the filling)
1 tsp Chai Masala (this can be made at home or found in an Indian grocery store)

Directions for the Cupcakes:
1. Preheat oven to 350F and line muffin pan with cupcake liners
2. Puree the mango and mix with 1/2 cup of coconut soy milk. Set aside 1/2 cup of this mixture for the cake and reserve the rest for making the filling.
3. Whisk the soy milk and vinegar and set aside for a few minutes.
4. Sift flour, corn starch, baking powder, baking soda, and salt in a large bowl and mix.
5. Using an electric mixer, beat the margarine and sugar for about 2 minutes until light and fluffy. Beat in the vanilla then the 1/2 cup of mango puree mix. It will look a little curdled but do not overmix. It will come together later.
6. Alternate beating in the soy milk mixture and dry ingredients, stopping to scrape the sides of the bowl a few times. Mix until just combined.
7. Fill cupcake liners two thirds full and bake for 20-22 minutes. Let them cool completely.


Directions for the Filling:
1. Heat 1/2 cup of the reserved mango mixture with 4tsp of sugar (use more or less depending on the sweetness of the mango).
2.  Once it bubbles add the corn starch mixture 1 tbs at a time while stirring until the mixture thickens. You may not need to use all of it. Let it cool completely. Set 1 tbsp of the filling aside if you are planning on making Mango Chai Spiced Buttercream.
3. Scoop out the middle of each cupcake and fill with spoonful of the filling. Replace the tops of the cupcakes if you wish. I filled a disposable pastry bag with the mango filling and using round tip, I piped the filling into each cupcake until a little filling came out of the top. Use a spoon to scrape the excess filling off the top of the cupcake before frosting. 
4. Frost with your favorite buttercream. I used Mango Chai Spiced Buttercream (recipe provided below)


Mango Chai Spiced Buttercream
recipe by Madhvi
Ingredients:
1 cup Butter, room temperature
3 1/2 cups Powdered Sugar
1 tbsp Mango Filling (recipe above)
1 tsp Chai Masala

Directions:
1. Using an electric mixer, beat the butter until light and fluffy.
2. Turn the mixer on slow and add the mango filling and Chai masala and beat until incorporated.
3. Slowly add the powdered sugar in small batches so that it doesn't fly everywhere.
4. Mix until frosting gets to the thickness you like, adding milk if the frosting is too thick or powdered sugar if the frosting is too runny.